
Creating a food product involves four key steps: choosing the type of product, entering generic product details, specifying if packaging system is to be included or not, before deep diving into the product's lifecycle. Here’s a detailed breakdown of the process:
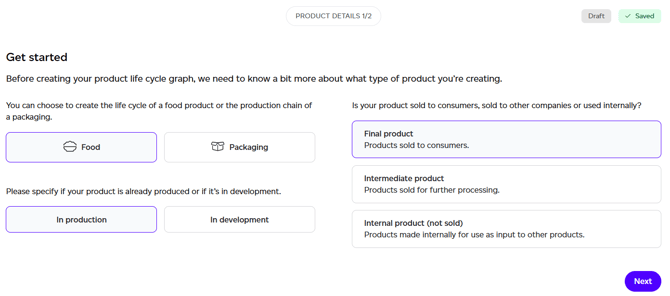
Step 1: Choose the type of product you want to model
- Product Class: Choose if you want to model a food or a packaging product. This article is a step-by-step guide to creating a food product. You can read all about creating packaging products here.
- Development Stage: Choose if this product is in production (currently being sold) or in development. This will determine if a product can be selected for baseline/historical volume reporting
- Product Type: Select whether the product is final (B2C), intermediate (B2B), or internal (raw material used in another product).
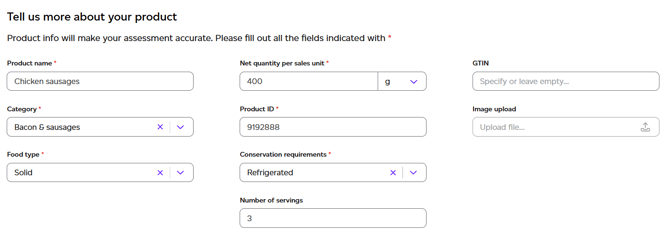
Step 2: Enter Generic Product Details
Start by entering essential product information:
-
Product Name: Provide the product's name.
- Net quantity per sales unit: Specify the product weight or volume (in grams or millilitres), excluding packaging (both consumer and transport packaging).
- GTIN: Include the Global Trade Item Number, if available.
- Category: Select the product category, which helps estimate food loss and waste during distribution and consumption.
-
Product ID: Enter your product ID. This must be unique across all workspaces.
-
Food type: Choose whether the product is solid or liquid to determine waste streams.
- Conservation Requirements: Indicate whether the product requires ambient, refrigerated, or frozen storage.
-
Servings: Indicate the number of servings the product contains.
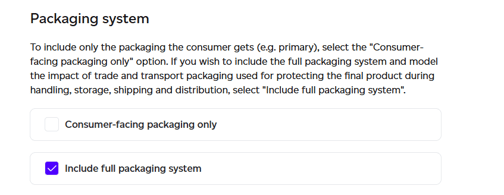
Step 3: Specify if you want to model the full packaging system
Specify whether you want to include the full packaging system in your product modelling. This is any transport packaging used to protect the final sold good for handling, storage, shipping and distribution (e.g. pallets, cases, wraps etc.)
Step 4: Map the Product Lifecycle
Once the basic product details are entered, click ‘Next’ to proceed to the Product Lifecycle Mapping tab. Here you will map the flow of raw materials into your facilities and the distribution path of the product once it’s ready for shipment.
- Final products: Includes all five life cycle stages all the way to the consumer
-
Intermediate Products: These products cover up to the distribution stage.
-
Internal Products: These include only the first two stages to ensure no double counting in supply chain assessments.
You will be presented with a Graph View, which visually represents the lifecycle of your product. You can also switch to the List View, which displays all lifecycle stages as a simple list for easier review.

Graph vs. List View
-
The Graph View (default view) provides a visual map showing how everything connects in the product lifecycle.
-
The List View offers a more straightforward overview of each node in the lifecycle, making it easier to see the amounts, suppliers, and other key details.
You can toggle between the two views at the top of the page to suit your preference. The Graph View will be the primary focus for this article.

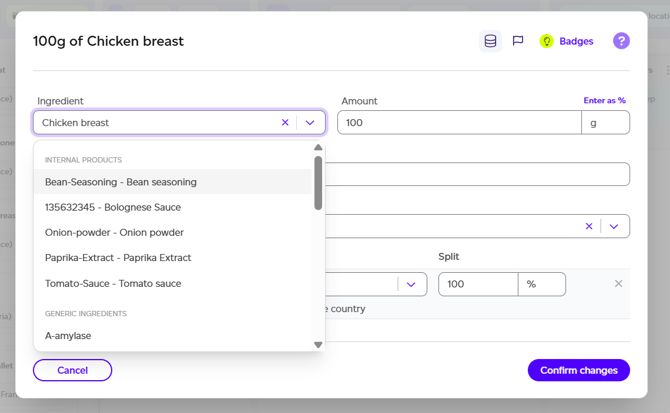
Step 5: Add Raw Materials (Ingredients & Packaging)
-
Ingredients: Add all raw ingredients used to create your final product. For each ingredient, specify:
-
Amount (in grams or millilitres)
-
Supplier(s): You can either select an existing supplier from the Manage tab or create a new one by typing the supplier's name and clicking ‘+ [new supplier name]’. If the supplier has multiple roles (e.g., both supplier and transporter), you can add multiple types under Type of Provider.
-
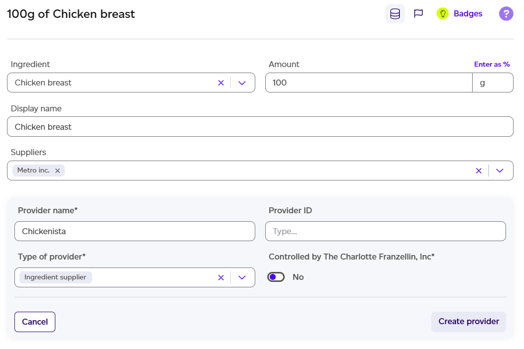
After adding a new supplier, you can enter details such as:
-
-
Split (%): The percentage of time you sourced the ingredient from this supplier over the past 3 years.
-
Country of Origin: Where the supplier sources the ingredient.
-
-
Packaging: There are two types of packaging you can add in your model

-
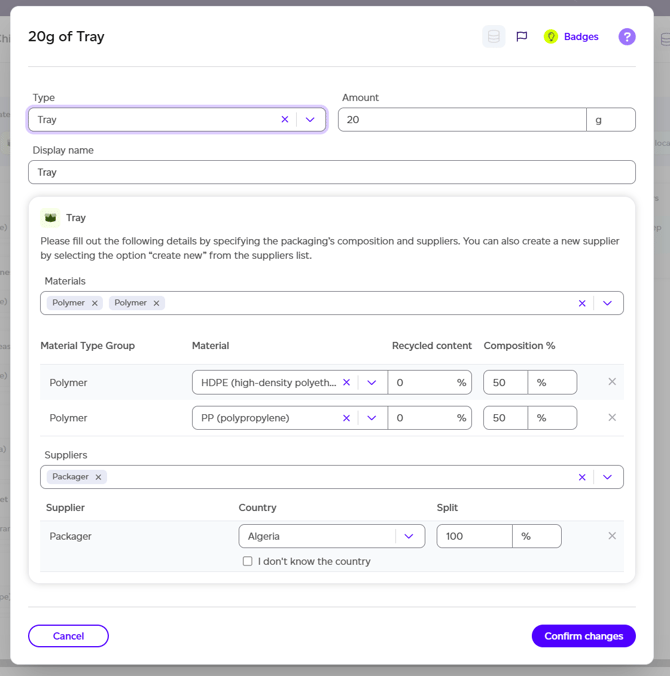
Consumer-facing packaging: this is the packaging your final good is sold into to the consumer/customer. To add a new consumer-facing packaging, you need to specify the following:
-
Amount (in grams)
-
Supplier(s): Select or create new suppliers as needed.
-
Split (%): The percentage of time you sourced the same packaging from this supplier over the past 3 years.
-
-
Material type group(s): Choose the type of materials that make up the packaging.
-
Material: Specify the actual material (eg. HDPE, LDPE etc.).
- Recycled content: The percentage of that material that is recycled. This is set to 0% by default.
-
Composition (%): Specify the material composition of the packaging.
-
-
-
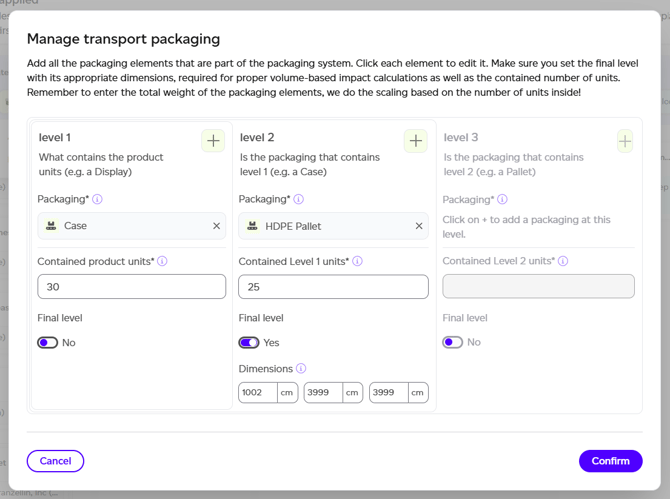
Transport packaging: As described above in Step 3, this is packaging used for transport from final manufacturing facility to the consumer. All transport packaging is managed via the transport packaging interface, where you need to specify:
- Final level: This is to indicate which is the outermost layer of packaging. A level is defined as all packaging components removed at the same time in the same place.
- Dimensions (in cm): For the final level, dimensions need to be provided in order to properly account for the volume of the total transported good. Volumes of the levels below are estimated using these dimensions and the number of units inside.
- Contained number of units: The number of units of the previous level contained at each level (e.g. how many product units in Level 1, how many Level 1 in Level 2 etc.
- Packaging: You can add any number of packaging components at each level (e.g. film, pallet and labels all in Level 2).
- Final level: This is to indicate which is the outermost layer of packaging. A level is defined as all packaging components removed at the same time in the same place.
-
If you can’t find a specific ingredient, packaging component, or material, you can add a placeholder by selecting ‘Other’. You’ll be able to add a comment to notify our team for assistance. For more information about the packaging type or materials currently on offer, check out our glossary.
.png)
Once all raw materials are added, your graph will begin to populate, visually showing the flow of these materials through the lifecycle.

Filling the gaps with defaults or complete manually
From here, you have two options:
-
Use our defaults generator by clicking on ‘Apply defaults’. This is particularly useful if you have no further visibility into your product life cycle beyond raw materials. Our system will automatically populate the graph with some default facilities and transports to allow you to generate an initial impact assessment with little first-party data. You can come back to add more later. All default nodes in the graph will appear with a ‘default’ tag attached to it.

-
If you know the various facilities involved in your product’s life cycle as well as what production steps are required to make it, the recommended option is to move onto the next step in your product creation process
Step 6: Add Facilities and Locations
-
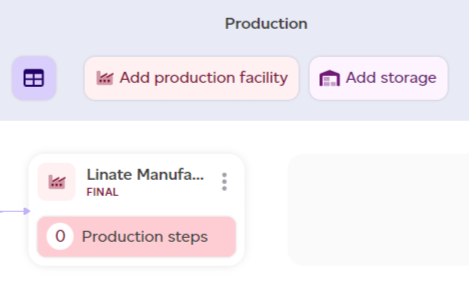
Production Facilities: Add one or more production facilities where your product is made. Ensure at least one is designated as the final production facility, which results in your SKU ready for distribution.
.png)
-
Warehouses and Stores: Add locations where raw materials, intermediate products, or finished goods are stored, including your warehouses, logistics companies, or retailers.
-
Consumption Locations: For final products, specify where the product is consumed (e.g., country, region, or city).
-
Final Destination: For intermediate products, add the point where your product is handed over to the downstream customer.
For each facility or location, specify the agreement type (direct or indirect) and country/region of operation. These details affect Scope 3 categorisation.
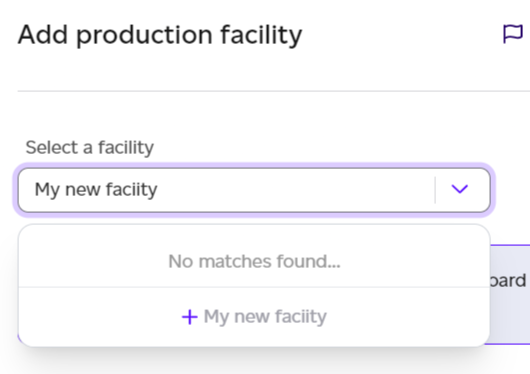
Facilities/locations can be added under most life cycle stages (production facilities, warehouses, stores and consumption locations). You can either select a facility/location created under the Manage tab from the drop downs or create a new one by simply typing the name of the facility you want to create and click ‘+ [new facility name]’
![create a new one by simply typing the name of the facility you want to create and click ‘+ [new facility name]’](https://cdn.document360.io/e152fca3-6563-4189-aa51-93d79ca12114/Images/Documentation/image(15).png)
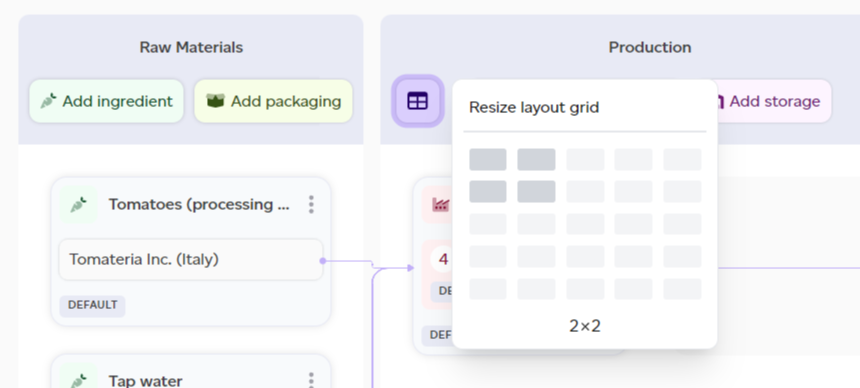
You can move elements around the grid as needed to create a coherent picture: click the little grid icon to resize your grid, add columns or rows, and move the elements around as you wish to visualise as clearly as possible the flow of your SKU across its life cycle.
Step 7: Establish Transport Links
Connect your raw materials to the relevant production facility with transport links: this is essential because only raw materials transported to the facility will be available to select as inputs in your production steps.
-
If only one facility was added to the graph, these are generated automatically for you, using our default regional transport services supplier and transport conditions which you can later modify by clicking on the transport link and selecting edit. Defaults appear with the ‘default’ tag.
.png)
-
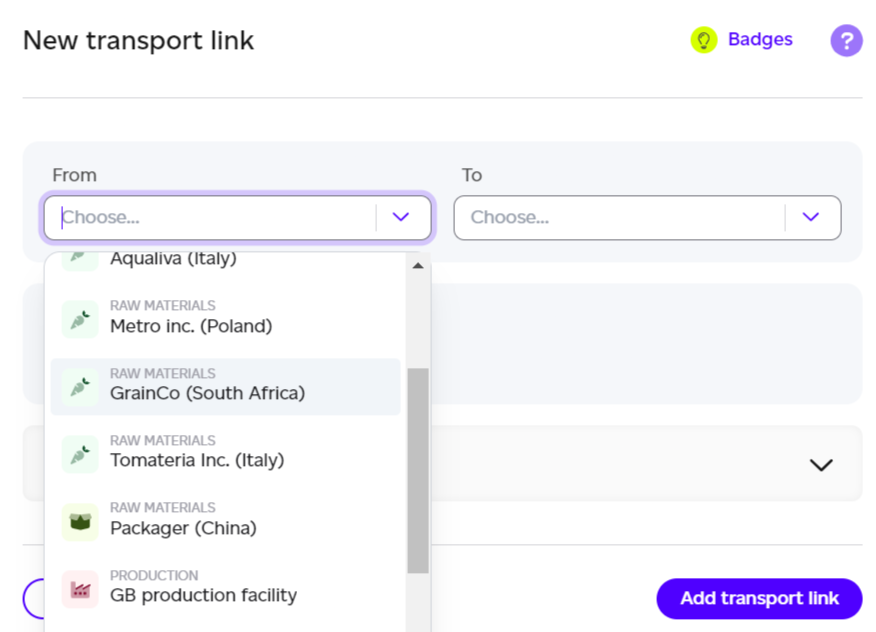
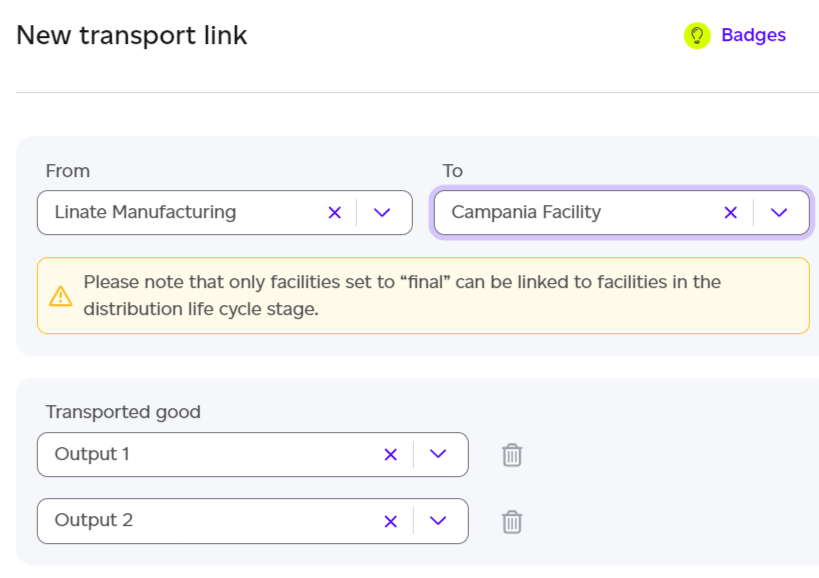
For each transport link you create manually, you need to specify:
-
From and To, selecting the origin and destination of your transport
-
Transported goods (if the same supplier/origin provides multiple goods).
-
Transport conditions to specify whether this transport is refrigerated, ambient or frozen.
-
Transport services supplier to specify which company is responsible for providing this transport service. For transport suppliers, you are asked to confirm the agreement type with that supplier (whether it’s a direct contract or indirect via someone else). This will affect Scope 3 categorisation. By default, this will be inherited from what was set at the supplier level.
-
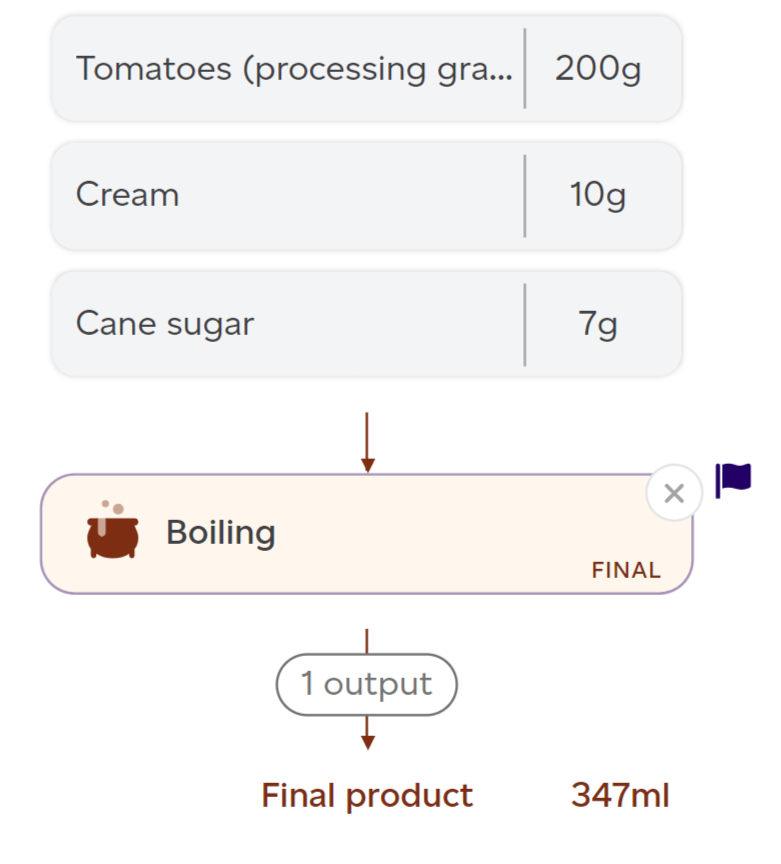
Step 8: Add Production Steps
The next step consists in specifying what happens inside the production facilities:
-
Clicking on the inner box of the production facility will open a new graph where you can specify the various production steps happening inside this facility to turn your raw materials into the final product your consumers will get to eat/drink.
-
Choose whether you want to add a food production step or a packing step. For each step, you can enter the following information:
-
Process, selecting the relevant one from our list of industrial processes
-
Specify if it is the final step happening in a given facility
-
Input(s), selecting what the inputs) to the process should be and what amounts are being used in this particular step.
-
Remember that transport needs to have been added for your raw materials to appear in this list.
-
If this is a packing step, make sure you have at least one packaging raw material as well as an ingredient or intermediate product as inputs for this to be valid
-
-
Optional inputs, where you can add primary data about your specific process. We can either use our default assumptions, or our assumptions (including energy and water) get replaced with your own collected primary data. When looking for this data, make sure you input the amounts required for this specific process (ie. boiling, frying etc.) to produce one SKU only. Good LCA practice suggests taking an average of the inputs and outputs over a representative period of time, e.g. one year for an industrial plant.
-
Output(s), if it is not the final step of your final production facility, which results in the SKU being ready, you need to specify at least one intermediate product, name it and specify what amount is made. You may also have other outputs resulting from this step including waste, emissions, by products or co products. Add as many as you need in here!
-
Optional outputs, the same as for inputs, you can choose to override some of the secondary data assumptions with your own data or not. You can also come back to add this later.
-
If you can’t find the processes you need, you can add a placeholder by searching for ‘Other’ under process.
Please add a comment to communicate to our in-house experts what you need us to add and our team will get notified instantaneously.
.png)
Add missing transports
If you have multiple production facilities or warehouses in sequence, make sure to add a transport links from one to another specifying which output is being transported from one facility to the next. This is important otherwise you won’t be able to select it as an input in the following facility.
With the above steps, you should have finalised your product life cycle up until the end of the production life cycle stage. Next you can add transport to connect the various facilities and locations in your graph, to specify how your product SKU goes from your final production facility to the consumers. Remember that every component needs to be connected to something.
Step 9: Add Distribution Data
Specify how long and under what conditions items are stored in your various warehouses and stores.
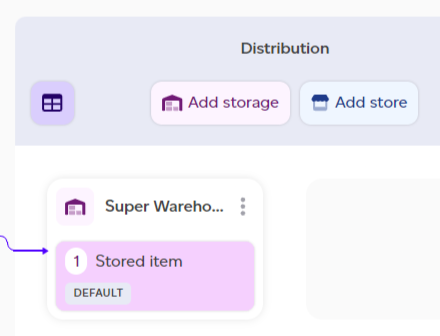
-
Whether warehouses are used to store raw materials, intermediate products or the final SKU, you can open any warehouse by clicking on its inner box. The same is true for stores in the distribution life cycle stage.
-
Once opened, You can specify for each item in there the storage condition and duration. Defaults are applied based on PEF assumptions and can be modified if primary data is available for the corresponding facility. For the distribution life cycle stage, the final SKU storage condition is fixed based on the conservation requirement set on the very first tab of the product creation.
.png)
Step 10: Specify Preparation Steps (If Any)
For final products, specify any preparation steps required by the consumer, such as cooking or rehydration. You can define the process, inputs, and outputs, along with any primary data you have regarding preparation.
.png)
.png)
If you can’t find the household processes you need, you can add a placeholder by searching for ‘Other’ under process.
Please add a comment to communicate to our in-house experts what you need us to add and our team will get notified instantaneously.
-
Once a step is added, it will appear in the graph for the given consumption location. This interface behaves very similarly to the main graph and you can move elements around the grid as needed to create a coherent picture: click the little grid icon to resize your grid, add columns or rows, and move the elements around as you wish to visualise as clearly as possible the flow of preparation steps.
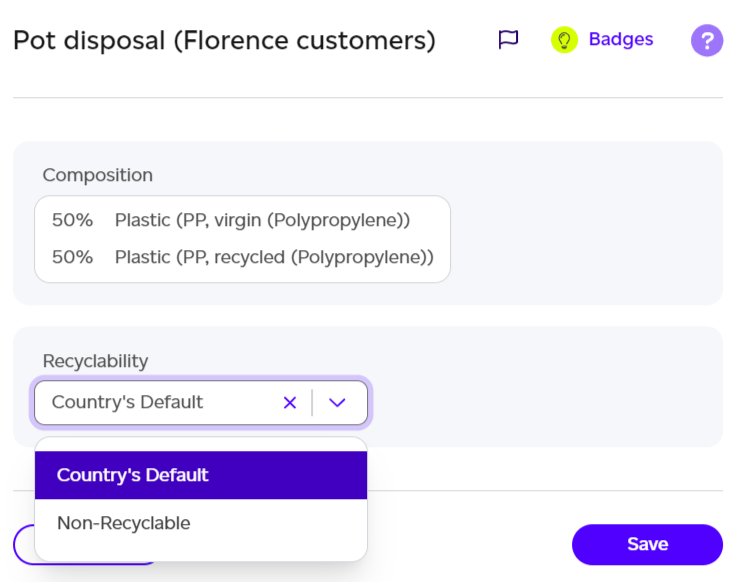
Step 11: Packaging Non-Recyclability
If packaging is non-recyclable in a certain location, update the end-of-life stage for that packaging.
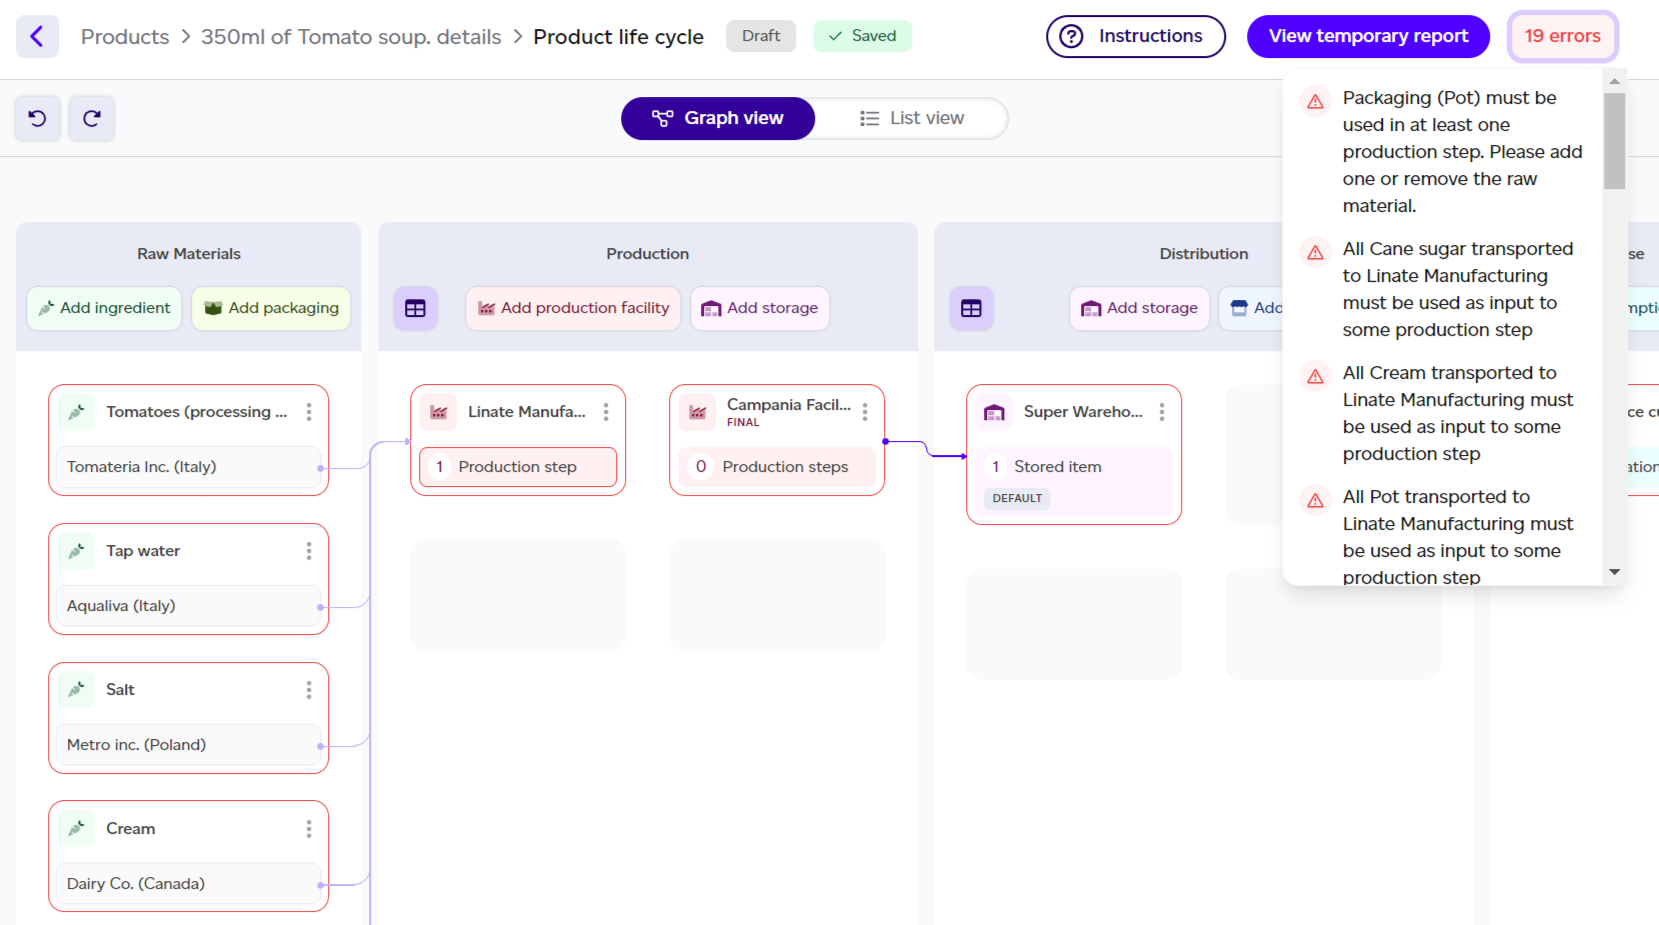
Step 12: Generate Report
Once all steps are complete, click ‘Generate Report’. If there are any issues with the data, including mass balance issues and disconnected nodes, you’ll be prompted to resolve them. Once all errors are fixed, you’ll be able to generate a final report using both primary and secondary data for your product.
Other possible actions
Flagging
You might want to flag a specific node to remember to come back to it at a later stage. This can happen if you don’t immediately have the data and put a temporary placeholder to keep going or if you are unsure about some of the details. To do so, all you have to do is click on the little flag icon in the top right corner of any modal. This will turn blue.


When the modal is closed, the flag is visible in the top right corner of the node to remind you that this node requires your attention.
Undo/Redo
As you create your product, if you ever need to undo a chance you just did, you can click on the undo/redo buttons in the top left of the graph.
View datasets in use
Clicking on the database icon from within the product editing interface will show in real-time which datasets are in use for this product's impact calculation.

Datasets can be viewed for the entire product by clicking on the database icon at the top of the graph, or this view can be filtered to a specific node of the graph by clicking the icon on the modals directly (e.g. inside a production facility, or in the ingredient modal)

