
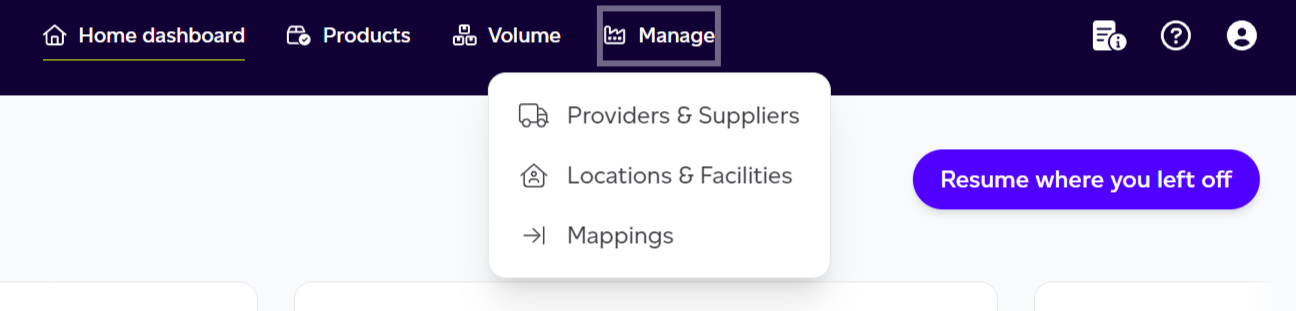
Clicking on Manage in the top menu and then selecting Mappings will take you to the mappings management tab, where you can see the list of all mappings used across your entire company account, not just within the active workspace.
Mappings are essentially interpretations of customer data (i.e., what the data provided by the customer was matched to in our underlying datasets) when ingested automatically. This interface was built to allow for bulk management of those mappings. While our AI matcher does its best to match what it reads from your systems/documents and map it to existing datasets, it’s not always successful. Therefore, this interface provides an efficient way for you to review and correct mappings, saving you from manually editing each product.
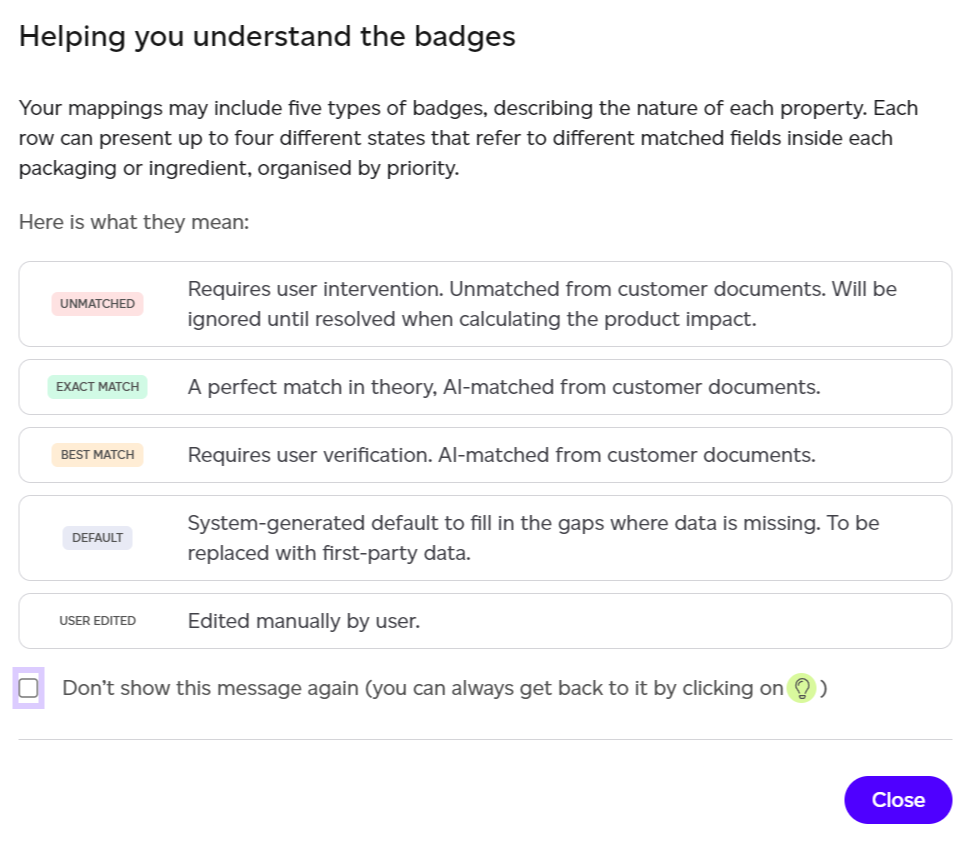
When you first open this tab, you will see a modal explaining the various badges present on the tab. These badges indicate the accuracy of a data match, and there are five types:
-
Unmatched
-
Exact match
-
Best match
-
Default
-
User entered
If no data was automatically ingested from your systems or through a bulk import, this section will be empty. This is the case if you’ve manually created all your products, in which case no automatic mappings need reviewing.
If data was imported automatically via APIs or offline import, you will see a list of all your mappings, organised into two main sections:
-
To be reviewed mappings:
-
This includes all unmatched (shown with a red background) and best match data, which require customer review.
-
-
Resolved:
-
This includes exact match and user edited badges and are lower priority for review.
-
Actions Available:
-
Find a specific mapping by the name of the original data.
-
Edit any mapping by clicking the pen icon on the relevant row.
-
Filter to view only mappings that need to be reviewed or resolved.
-
Filter by mapping type (ingredients or packaging).
-
Filter to view specific match types (e.g., best match, exact match, unmatched).
Navigate to a different section of the Manage tab using the left menu.

Each field in a mapping is assigned a match quality. A single mapping can have multiple badges (e.g., packaging type, packaging materials). In this case, the worst quality is displayed first, with a +N others label to show any other associated badges. You can click on +N others to view the other badges or edit the mapping directly to see the full details.
![]()
Editing a Mapping
Clicking on any row of this table will open a given mapping, where you will see two main sections:
-
Original Data Section:
-
This section shows what was extracted from your system or documentation, and how many products this mapping was used in. Prioritise reviewing mappings used in the largest number of products, as they will have the biggest impact if wrong.
-
-
Mapped To Section:
-
This section shows which datasets the data was mapped to within Sustained. Each mapped field has its own state, which represents the confidence in the mapping as discussed earlier. If defaults are applied, it means the data couldn’t be extracted, and our defaults were used instead
-
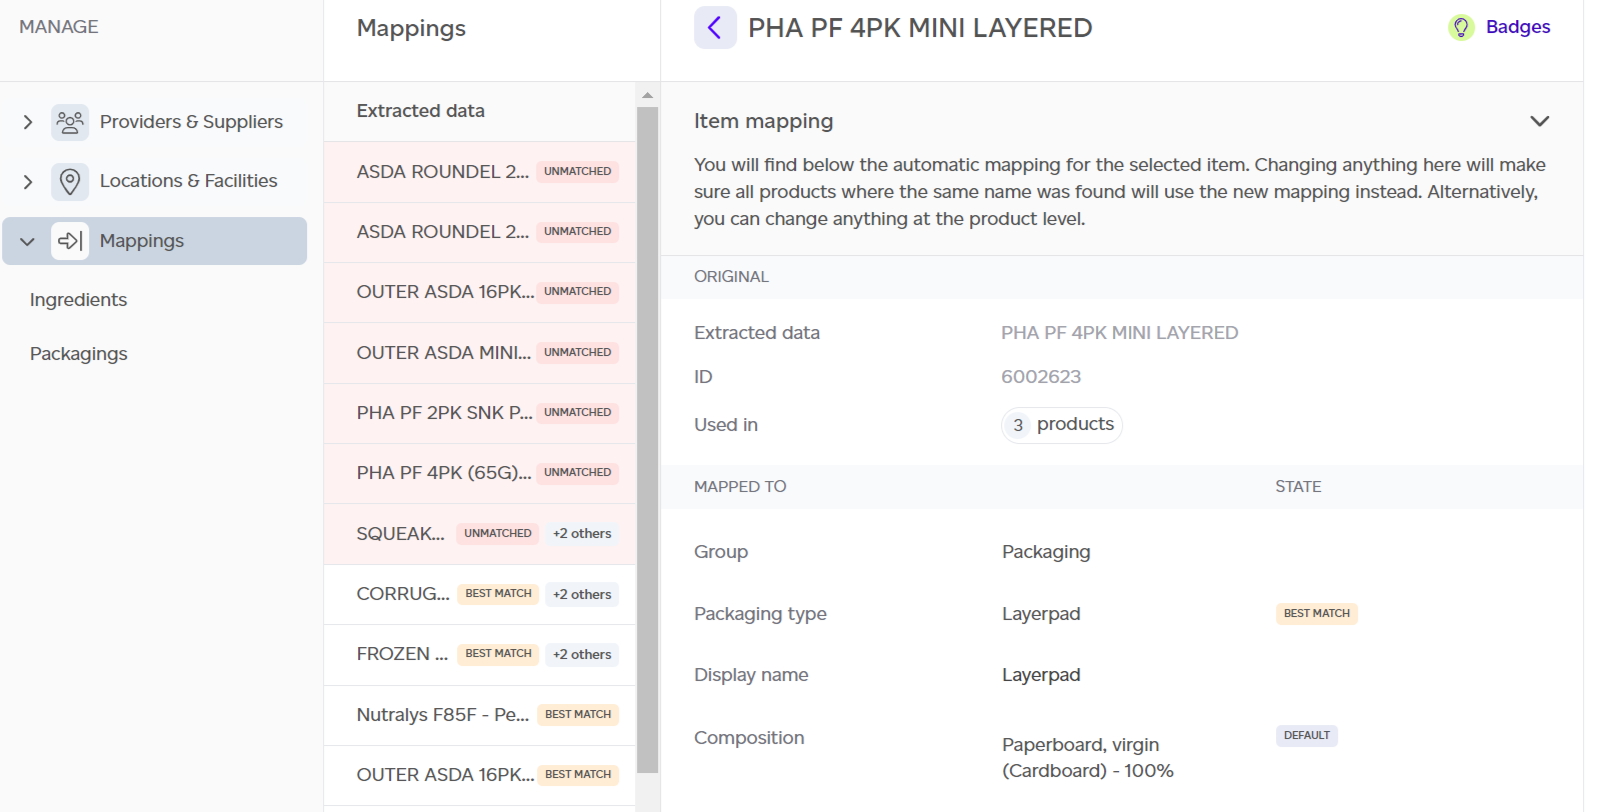
You can click on any of the ‘Mapped To’ fields and modify the information as needed.
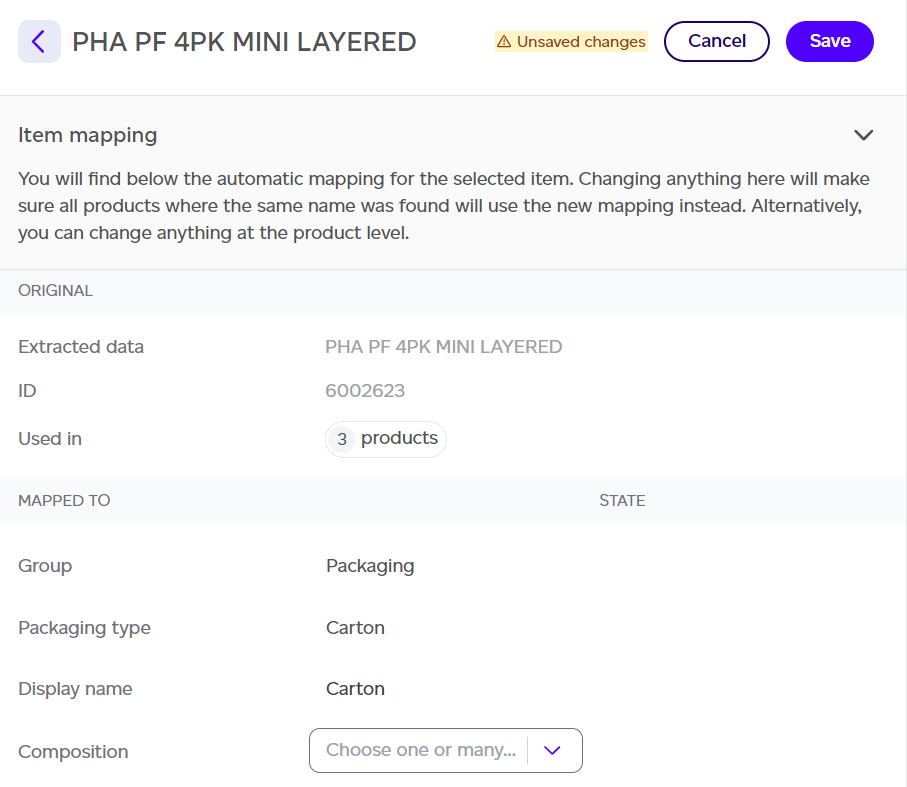
Once you’ve made the desired changes, click ‘Save’ at the top to propagate your changes across all products using this mapping. After saving, your fields will display ‘user edited’ badges, and the ‘updating products’ status will appear at the top as the changes are applied.
.png)