Clicking on Volume in the top menu will open a modal with five choices. If you click on Historical Reports, you will be redirected to a list of all historical reports available for the active workspace.
If no reports have been uploaded yet, this list will be empty, and you will be prompted to upload your first set of data.
If at least one historical report exists, you can:
-
Search for a specific report by name
-
View a report (if it has been generated)
-
Delete a report
To upload historical data, the process is very similar to that of setting a baseline, with the only difference being that you can upload manufacturing output data for as little as one month. The resulting report will also compare your data to the baseline to help contextualise your progress since the beginning of your journey.
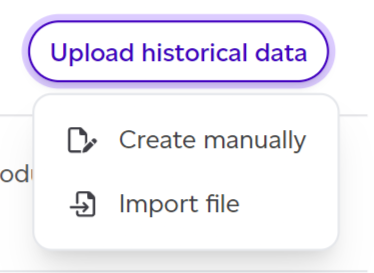
When you click ‘Upload historical data’, you’ll be given the choice between manual data entry or file upload.
Manual Data Entry
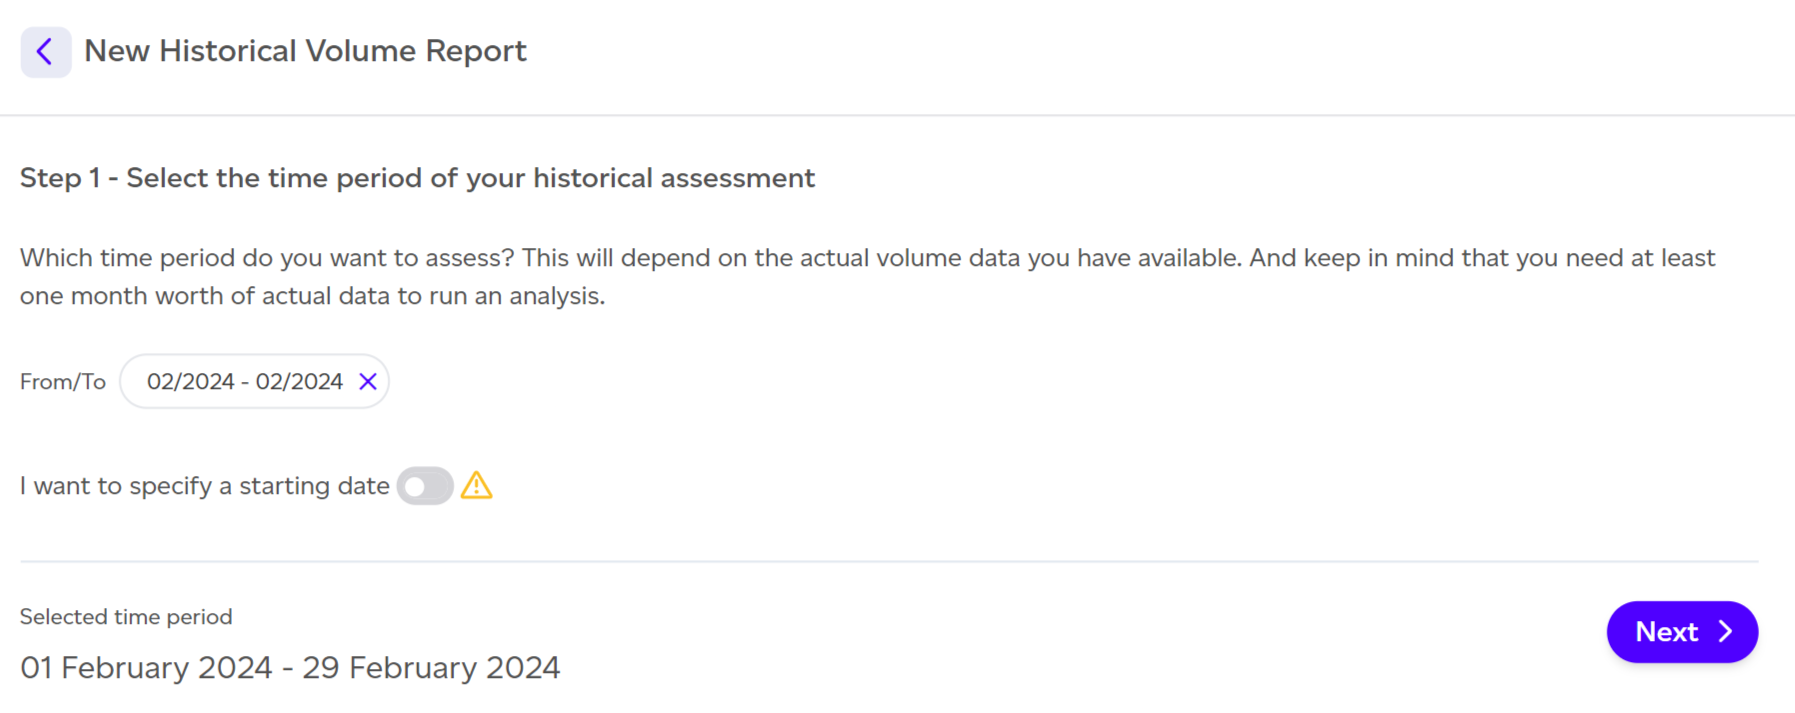
The first step in manual entry involves selecting the time period for your historical data. Ideally, this should be for a full month (from the 1st to the last day of the month), ensuring it does not overlap with any existing data to track progress consistently over time. You can select multiple months if granular data for each month is not available. By default, the last full month will be selected (e.g., if it's March 2025, 2024 will be selected).
If a full calendar month is unavailable, you can toggle the ‘I want to specify a starting date’ option to manually set a start and end date. However, selecting specific starting dates will disable all progress tracking views in the workspace.
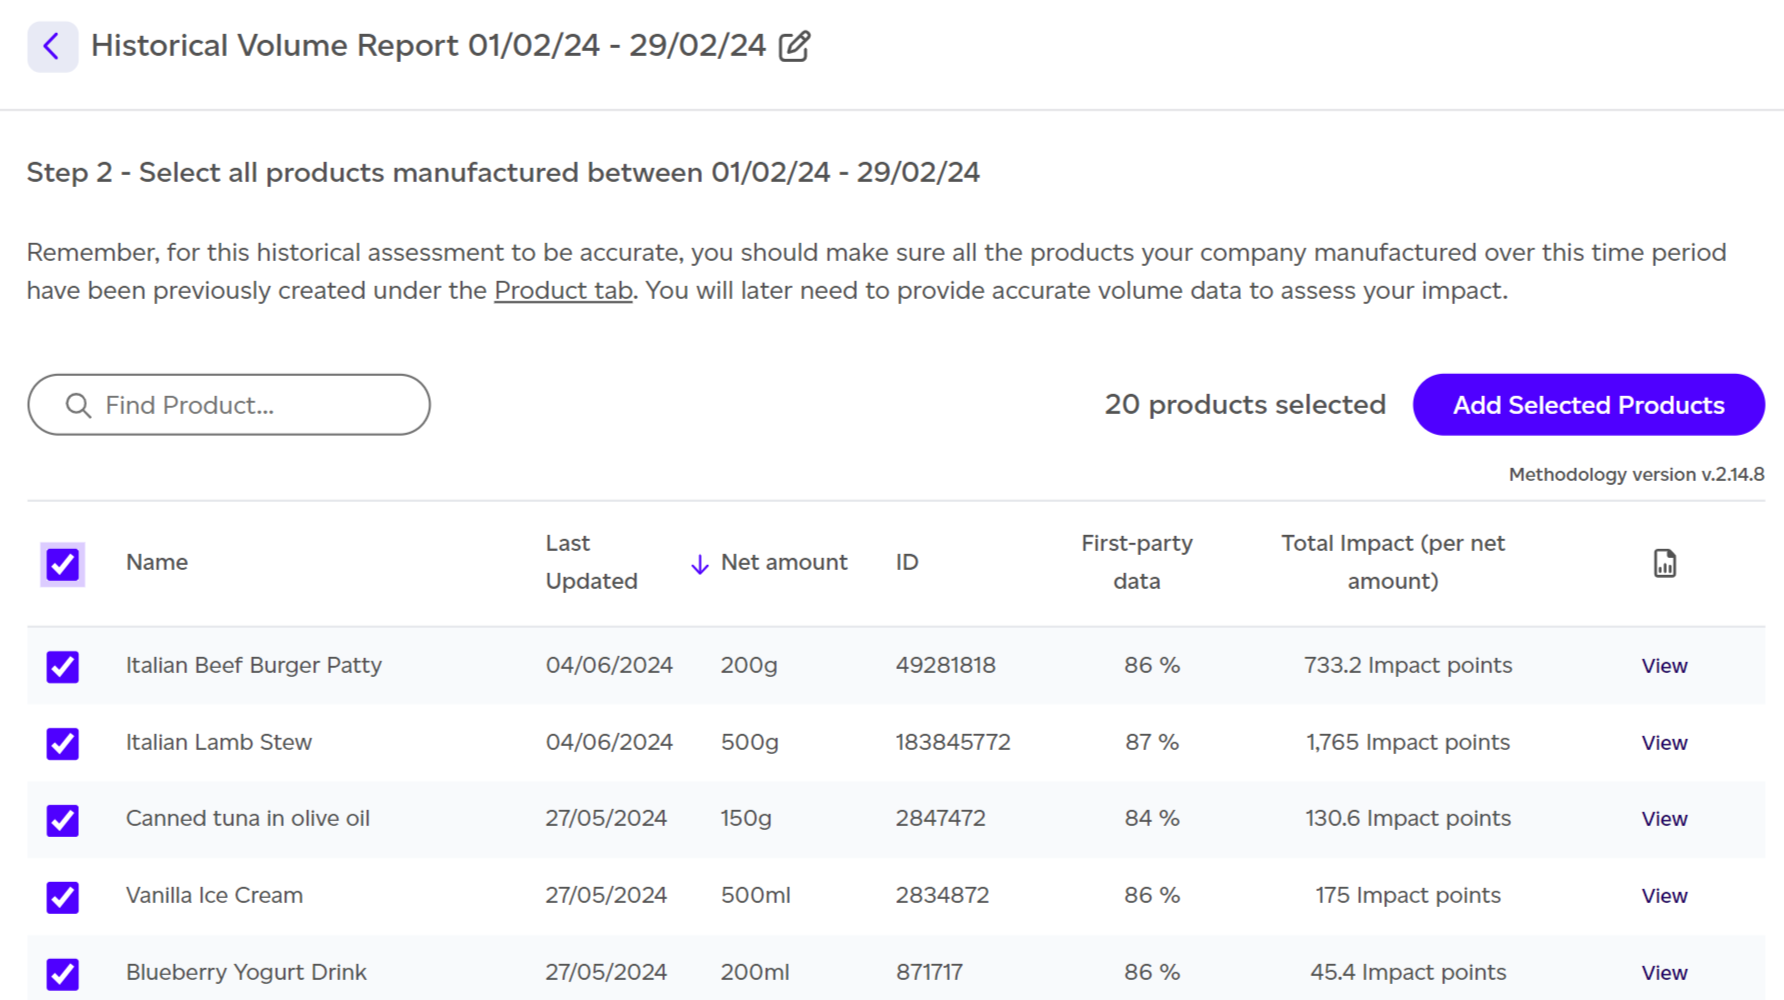
After selecting the dates, you'll be prompted to select the products you manufactured during that time. You can select products individually or select all at once. Note that only intermediate and final products are visible to prevent double-counting, as internal products are considered inputs to other products.
On this step, you can:
-
Select products individually or choose all using the checkbox
-
View an individual product’s report by clicking ‘View’ next to the product name
-
Search for a specific product by name
-
Sort the table by different column headers
-
Rename the historical report by clicking the icon next to the report name
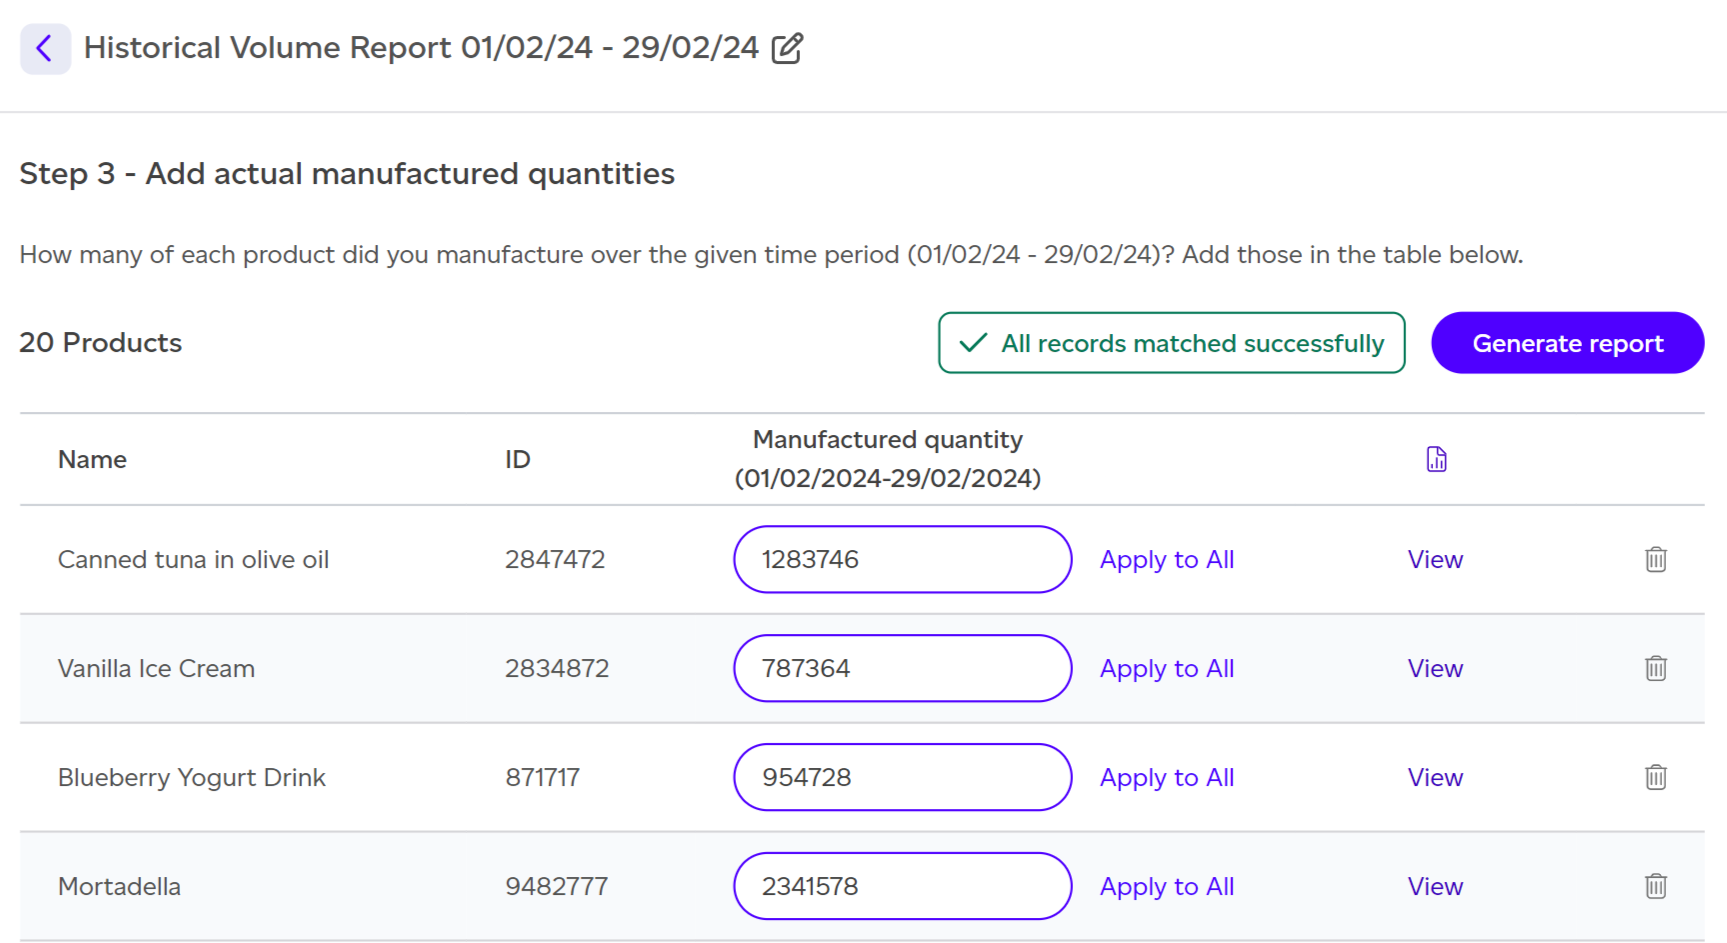
You will now be able to do the following:
-
Enter the number of units of each product you manufactured over the specified timeframe. You can enter numbers for each product or Apply to All to apply any entered number to all products. This will overwrite any previously entered numbers.
-
View any product impact report
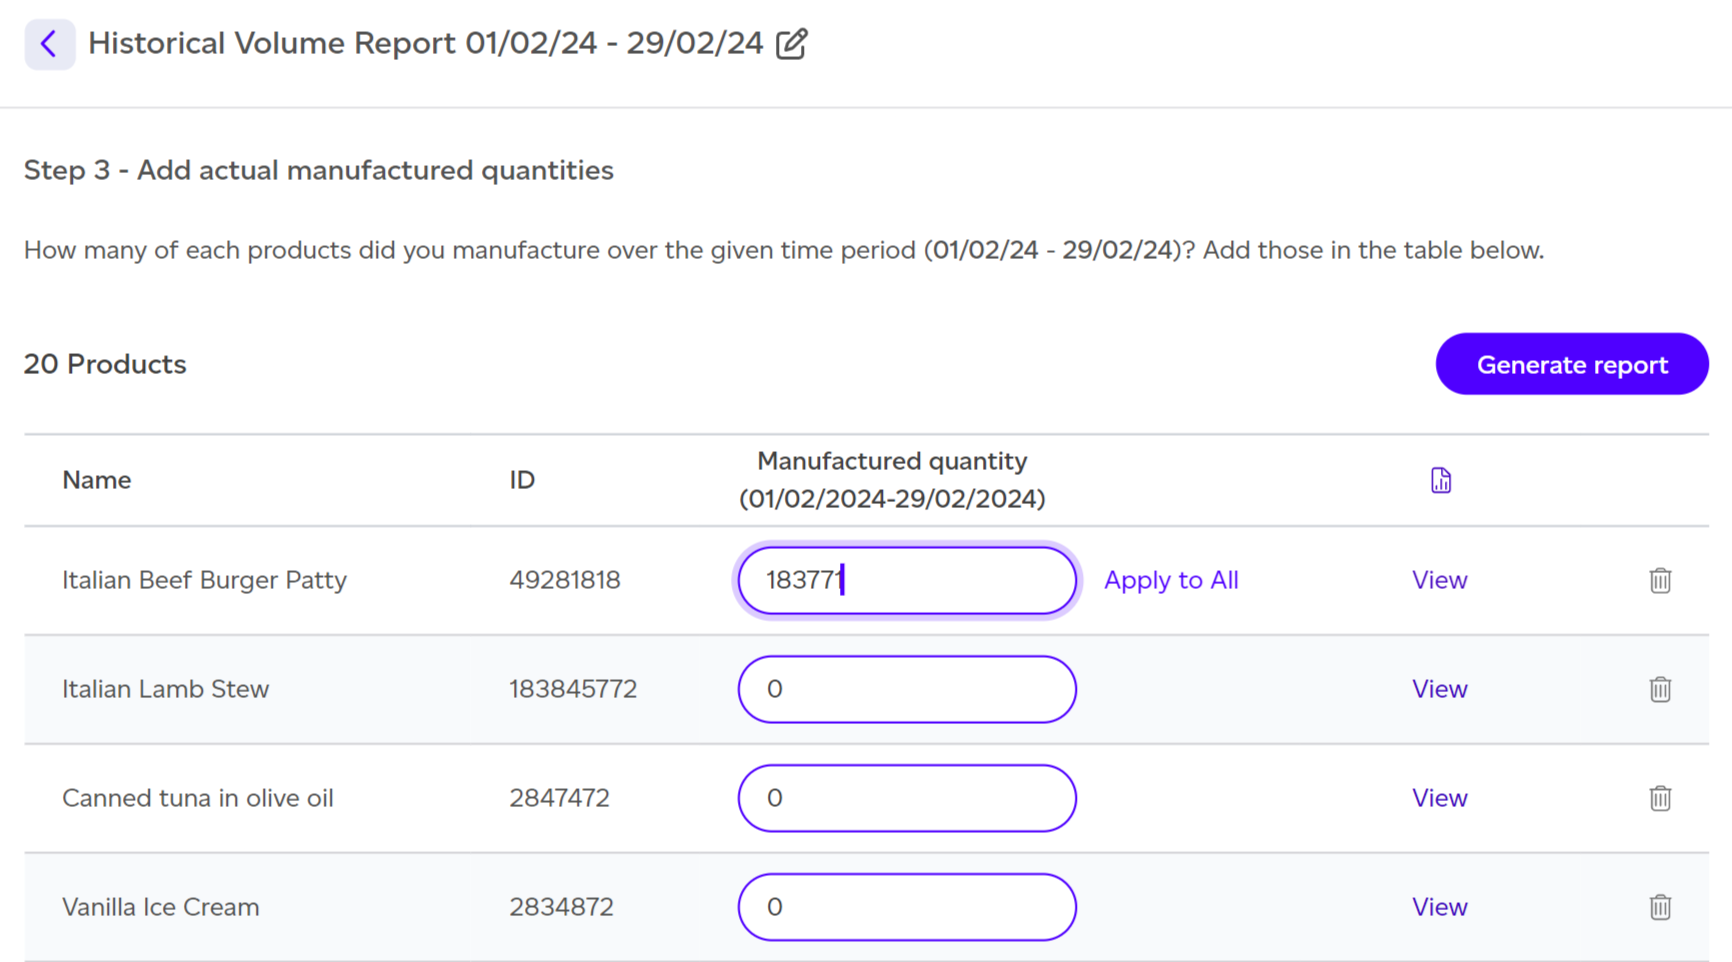
Once all numbers have been entered, click on ‘Generate Report’. This will use all the information provided and the individual product impacts to generate both PEF and GHG protocol based historical manufacturing output reports.
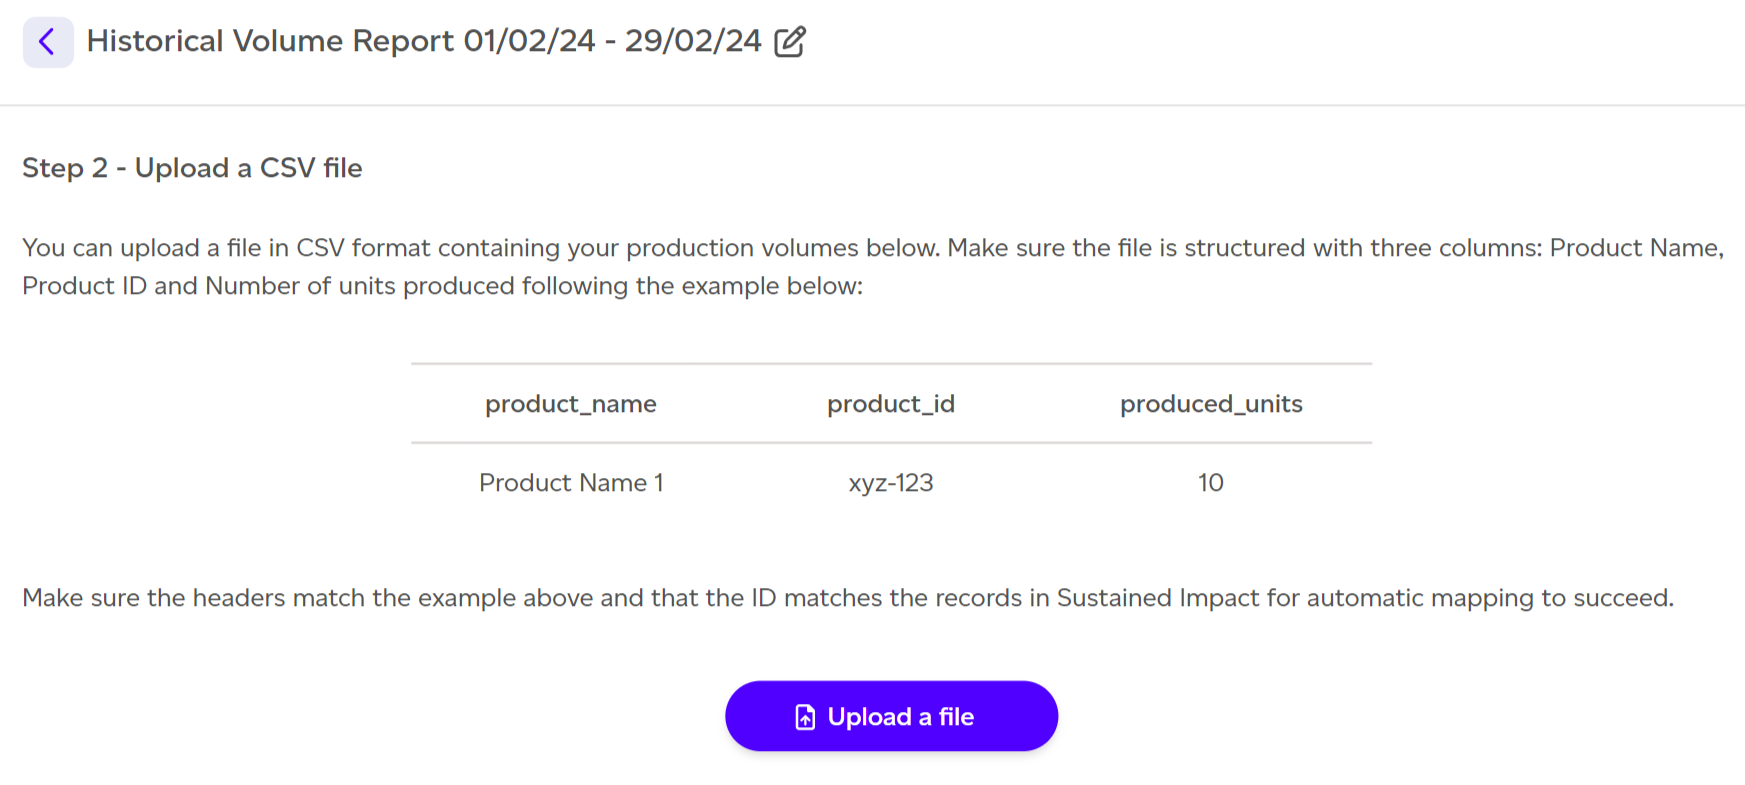
Import file
The first step will consist in selecting the time period of this assessment. Ideally, this is a full month (1st to last day of the month) and you need to ensure it doesn’t overlap with existing data. This allows to track progress consistently over time. Multiple months can be selected if the granular per month output isn’t known. By default, the last full month for which no data was uploaded will be selected.
If selecting a full month from start to finish is not possible because of lack of data, you can also toggle the ‘I want to specify a starting date’ option which will allow you to specify a start and end date. It must be for a minimum of 1 month. It should be noted that selecting specific starting dates will disable all progress tracking views within the workspace.
.
After selecting the time period, the next step will consist in uploading your file. You need to make sure of the following for this step to be successful:
-
File format is .csv
-
File structure includes the correct column headers as in the example provided
-
Product IDs match the records in our system
Once uploaded, simply click Next. This will take you to Step 3, where all you have to do is review the automatically extracted data. At the top of the table, you will be able to see if all records from your file were matched successfully or if some couldn’t be matched. You can either ignore the unmatched ones or make sure the IDs and names are correct in your file.
If everything looks correct, you can immediately click on ‘Generate report’ This will use all the information provided and the individual product impacts to generate the both PEF and GHG protocol based historical manufacturing output reports.